All Black Myth: Wukong Chapter 2 bosses and where to find them
Here's how to reach the secret bosses in Chapter 2 of Black Myth: Wukong
Looking for all the bosses in Chapter 2 of Black Myth: Wukong? If you're here, then you've likely made your way through most (or all) of the Chapter 1 bosses, and you're now wading through the deserts of Chapter 2 in Black Myth: Wukong. As befits a soulslike, there is a wide variety of boss locations littered throughout Game Science's new Journey To The West-em-up, and a good 16 or so are hiding away in Chapter 2. Some of which are very well hidden indeed.
In this guide, we'll walk you through how to find every single boss location in Chapter 2 of Black Myth: Wukong, ranging from main story bosses like the Tiger Vanguard and Yellow Wind Sage, to secret Yaoguai Kings such as the Black Loong, Fuban, and Mad Tiger.
Skip to a different Chapter here!
- Chapter 1 bosses
- Chapter 2 bosses (you're here!)
- Chapter 3 bosses
- Chapter 4 bosses
- Chapter 5 bosses
- Chapter 6 bosses
All Chapter 2 bosses in Black Myth: Wukong

Chapter 2 is grander in scope than Chapter 1, with a total of 16 bosses split between both Yaoguai Chiefs and Yaoguai Kings. There's also a greater number of easily missed and secret boss fights in Chapter 2, including the Mad Tiger; the Buddha's Eyeball boss known as Shigandang; the powerful Black Loong and Fuban bosses, and more.
Below is the full list of all Yaoguai King and Yaoguai Chief bosses you can find in Chapter 2 of Black Myth: Wukong:
| No. | Boss Name | Type | Location |
|---|---|---|---|
| 1 | Lang-Li-Guhh-Baw | Yaoguai Chief | Sandgate Village / Village Entrance |
| 2 | Earth Wolf | Yaoguai Chief | Sandgate Village / Village Entrance |
| 3 | King + Second Prince | Yaoguai Chief | Sandgate Village / Valley Of Despair |
| 4 | First Prince Of Flowing Sands | Yaoguai Chief | Sandgate Village / Valley Of Despair |
| 5 | Tiger Vanguard | Yaoguai King | Crouching Tiger Temple / Temple Entrance |
| 6 | Tiger's Acolyte | Yaoguai Chief | Yellow Wind Formation / Windrest Hamlet |
| 7 | Stone Vanguard | Yaoguai King | Fright Cliff / Rock Clash Platform |
| 8 | Gore-Eye Daoist | Yaoguai Chief | Sandgate Village / Valley Of Despair |
| 9 | Mother Of Stones | Not In Journal | Fright Cliff / Squall Hideout |
| 10 | Man-In-Stone | Character | Fright Cliff / Squall Hideout |
| 11 | Yellow Wind Sage | Yaoguai King | Crouching Tiger Temple / Cellar |
| 12 | Shigandang | Yaoguai King | Fright Cliff / Rock Clash Platform |
| 13 | Mad Tiger | Yaoguai Chief | Sandgate Village / Bottom Of The Well |
| 14 | Yellow-Robed Squire | Character | Fright Cliff / Rockrest Flat |
| 15 | "Tiger Vanguard" | Yaoguai Chief | Secret: Kingdom Of Sahālī / Sandgate Pass |
| 16 | Fuban | Yaoguai King | Secret: Kingdom Of Sahālī / Sandgate Bound |
| 17 | Black Loong | Yaoguai King | Fright Cliff / Hidden Loong Cavern |
Keep reading to find out exactly how to reach all 17 boss locations in Chapter 2 of Black Myth: Wukong.
1. Lang-Li-Guhh-Baw
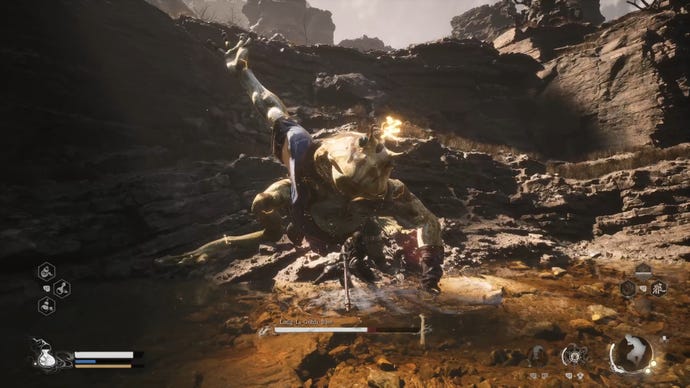
The first boss of Chapter 2 that you're likely to come across is Lang-Li-Guhh-Baw, a giant amphibian with quite a family resemblance to Baw-Li-Guhh-Lang from Chapter 1. To reach this Yaoguai Chief, simply drop down to the right of the "Village Entrance" Keeper's Shrine in Sandgate Village, and follow the path into the nearby cave. There you'll find Xu Dog, a wolfish NPC wearing a blue cloak, who asks you to deal with Lang-Li-Guhh-Baw in the clearing just ahead on the lower platform.
If you fought Baw-Li-Guhh-Lang, you'll know largely what you're in for with this fight. Expect lots of back-kicks and tongue attacks. What's different this time around is that Lang-Li-Guhh-Baw's attacks are imbued with lightning, and the boss itself is capable of summoning sparks of lightning which chase you down, requiring lots of careful dodging to evade. The good news is that if you return to Xu Dog after defeating this boss, you'll unlock the ability to craft your own consumable medicines at Shrines.
2. Earth Wolf
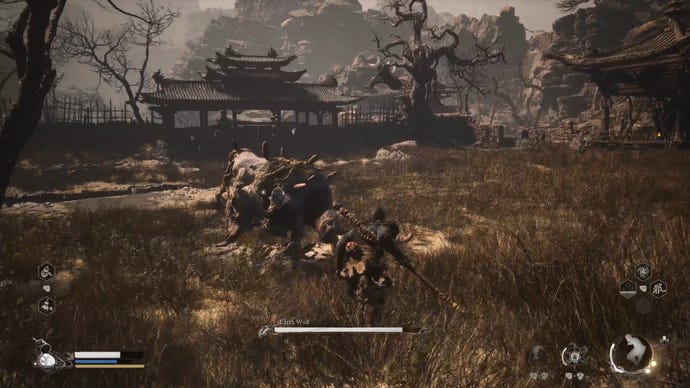
The Earth Wolf lies beyond the main gate right in front of the "Village Entrance" Shrine, but you cannot reach it this way until later on. Instead, you must head around the right-hand side by turning left in the cave where Xu Dog resides, and following the path all the way into the larger area patrolled by the two-headed Rat Captains. From here, hug the left-hand wall until you find an entryway through into the area on the other side of the gate, where the Earth Wolf can be found on patrol.
The Earth Wolf behaves much like any big lumbering beast you may have encountered previously, all swipe attacks and charges. The Pillar Stance is useful for staying out of the danger zone, and of course you should make liberal use of Immobilize to keep it still and burst it down with your hardest-hitting attacks. On death, you can absorb its Spirit using the Blessed Gourd.
3. King + Second Prince Of Flowing Sands
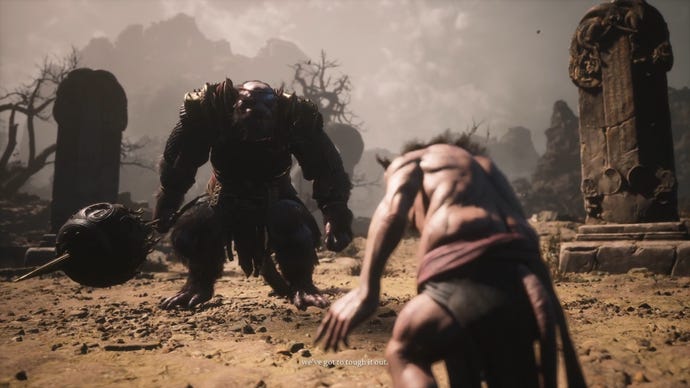
Possibly your first major hurdle in Chapter 2's roster of bosses will be the joint encounter of the King Of Flowing Sands, and his son, the Second Prince Of Flowing Sands. These two rats are found beyond the double doors in the area of Sandgate Village where the two-headed Rat Captains patrol (or patrolled, if you already killed them). Enter the arena for a lengthy cutscene, followed by an interesting two-pronged fight.
The main brunt of the attack comes from the much larger Second Prince in this fight, while the diminutive King prefers to stay at a distance and hurl ranged attacks at you to interrupt your combos. It's an irritating combination, but we'd encourage you to focus on the Second Prince, because if the Second Prince dies, then the King will flee and the fight will be over. If, however, you kill the King first, then the Second Prince will become much more powerful, making for a far tougher fight.
4. First Prince Of Flowing Sands
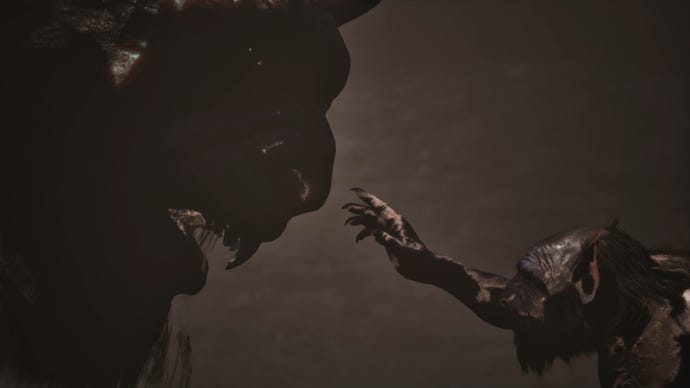
If you thought the Second Prince was a hulking brute, wait til you see his big brother. The First Prince Of Flowing Sands is located only a short walk down the left-hand path from the Valley Of Despair where you fought the King and Second Prince. If you left the King alive, he will make a blood offering to awaken the First Prince, after which he'll summarily be killed and eaten by his son. Plan rather backfired, really.
The key with the First Prince is not to be intimidated by his size. Get right in there and keep attacking. He hits hard, but he's also very slow, and he telegraphs his attacks enough that I never had any issue dodging them. If you like, you can also use him to break open the terracotta wall on the left side of the arena, which houses an important unique item that will unlock several multiple secret bosses elsewhere in the game. But if you don't manage to goad the Prince into breaking the wall, fear not; you can break it open yourself using the Wandering Wight Spirit attack, or the Azure Dust transformation.
5. Tiger Vanguard
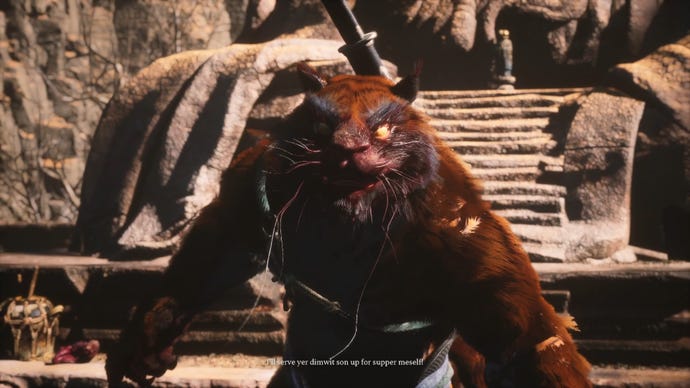
The Tiger Vanguard is the first Yaoguai King of Chapter 2, and he's suitably rather tough to defeat. To find him, head through the cave that houses the First Prince, beyond the Valley Of Despair. At the far end of the cave there is a small, slanted bridge you can cross, and not much further beyond that is a gap you can squeeze through. In the next room, take the path to the right and you'll reach the "Temple Entrance" Shrine outside the Crouching Tiger Temple. After that it's a straight trek up the temple steps to reach the Tiger Vanguard.
The Tiger Vanguard is impressively light on his feet for such a large and powerful foe, and his lunging sword attacks can wipe out most of your health bar in one go, so this is a fight to take quite patiently. Make use of the Red Tides spell to transform yourself and give yourself a "risk-free healthbar" as I call it, where you can just go all out on aggression for a short while, without caring too much about the damage you take. Kill it, and it'll drop the Keeness Of Tiger unique item that you can use to open a couple of doors later on.
6. Tiger's Acolyte
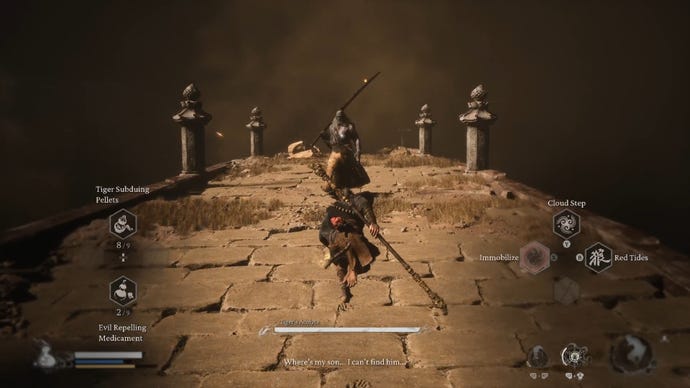
After the big beefy Tiger Vanguard, a little Tiger's Acolyte Yaoguai Chief should be no problem, right? To find the Tiger's Acolyte, follow the path beyond the Crouching Tiger Temple to enter the Yellow Wind Formation region. This region is very linear, so all you need to do really is keep pressing on until you find a bridge just beyond the "Windrest Hamlet" Shrine. On the bridge is the Tiger's Acolyte.
The Tiger's Acolyte, like the Vanguard, is very handy with a sword, and can deal a lot of damage in a short space of time with his very elegant attack chains. Fortunately, he has considerably less health than the Vanguard, which allows you to make use of all your abilities to burst him down as quickly as possible without too much fuss. On death, he drops the unique Old Rattle-Drum item, which is used for a specific questline in Chapter 2 which we'll explain later on in the Mad Tiger section.
7. Stone Vanguard
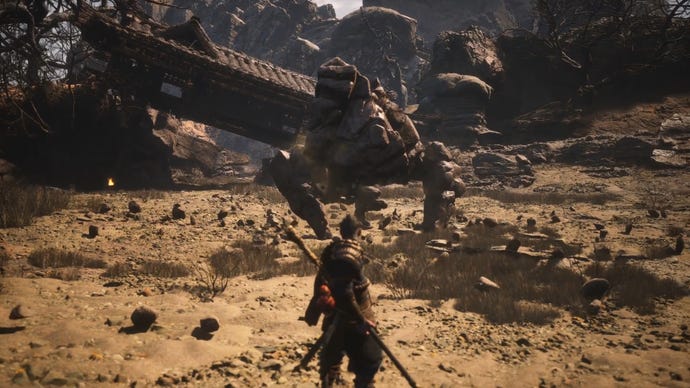
The Stone Vanguard, interestingly, can be found at the intersection point between two region paths, so there are two ways to reach it. The first is by continuing beyond the Tiger's Acolyte and through the entire Yellow Wind Formation. At the very end there is a ledge where you can drop down into the Stone Vanguard boss arena. The other way to reach this arena is by heading to the right from the Valley Of Despair (King + Second Prince arena) through the Fright Cliff region and all the way to the end. Pretty cool level design.
In all honesty I found the Stone Vanguard considerably easier than the Tiger Vanguard. It's just so much slower, and speed is extremely important in Black Myth: Wukong. Everything is pretty easy to dodge, including its "special" attack where it sends a bunch of minions to jump towards you in quick succession. The only annoyance really is its high health pool, which means you have to exercise some patience. Kill it, and you'll obtain the Sterness Of Stone item which - when combined with the Keeness Of Tiger item - will allow you to do two things:
- Open the main door out of the King and Second Prince boss arena.
- Interact with the tally by the giant Buddha statue in the Tiger Vanguard arena.
Both of these paths will eventually lead you to the same location, where you can find the final story boss of Chapter 2 - the Yellow Wind Sage. But we're getting ahead of ourselves! There are still plenty more bosses to find around here.
8. Gore-Eye Daoist
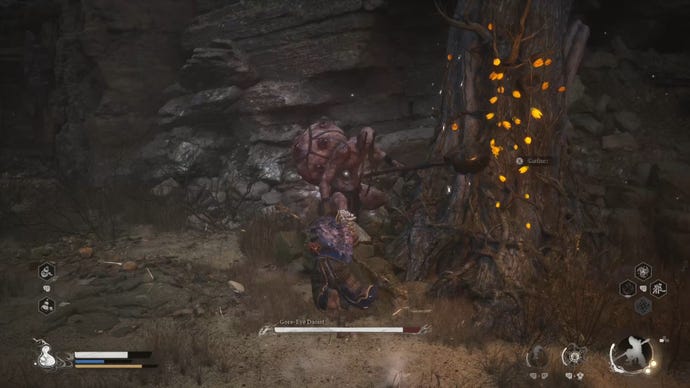
The Gore-Eye Daoist is a fairly lowly Yaoguai Chief in the grand scheme of things, despite appearing fairly late on in Chapter 2. To get to him, you can take one of two routes: either you can open the main door near the "Valley Of Despair" Shrine (after defeating both Vanguard bosses) and follow the path across the bridge; or you can head through the Stone Vanguard arena past the "Rock Clash Platform" Shrine, then turn right at the end of the path and take the sand slide down to the "Windseal Gate" Shrine. From there, just cross the bridge and head up the hill. Both paths lead to the same little clearing where you can find the Gore-Eye Daoist.
The Gore-Eye Daoist himself is hardly worth the effort it takes to reach him! He's got an interesting moveset which seems to involve spraying poisonous blood everywhere, but overall he's not that much more powerful than certain regular non-boss enemies, so it shouldn't take you long to deal with him and move on.
9. Mother Of Stones
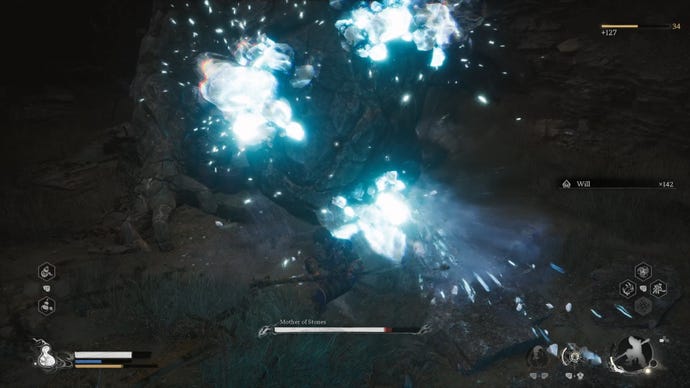
The Mother Of Stones is a large, tucked-away boss who is required for the Man-In-Stone questline, though she doesn't feature in the player's Journal at all. To reach her, you must enter the cave in the centre of the Fright Cliff region, then take a left turn just before exiting out of the cave. This path leads you to an upper level of the cave where you can find the Mother Of Stones chilling in a corner.
This is a rather bizarre boss fight, but not too difficult. Rather than attacking you directly, the Mother Of Stones simply summons more and more rocky minions to antagonise you. It's all a ruse - just pay them no mind, keep evading their attacks while bashing away at the Mother Of Stones, and she'll go down without a hitch. On death, she drops the Stone Essence item, which you can deliver to the Man-In-Stone to continue his quest.
10. Man-In-Stone
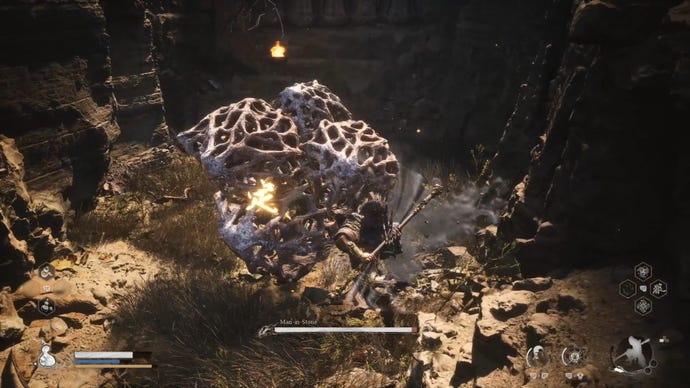
The Man-In-Stone is an NPC who doesn't really qualify as a true boss, but hey, he has a boss health bar, so I'm including him. You can find him and begin his quest by taking the lower route through the rock on the right-hand side of the "Squall Hideout" Shrine in Fright Cliff. He's trapped inside a rock, hence the name, and hence him asking you to deal with the Mother Of Stones in order to free him.
When you deliver the Stone Essence to him on your return, he'll burst out of the ground and reveal he tricked you and just wanted the item. After that, you can (and should) attack him. Despite his taunts, he is no match for you, with such a small health bar that you can probably burst him down before he's really done you any damage. Beat him, and he'll surrender and (after an area reset) become a vendor; and you'll also unlock the Azure Dust transformation spell as a reward.
11. Yellow Wind Sage
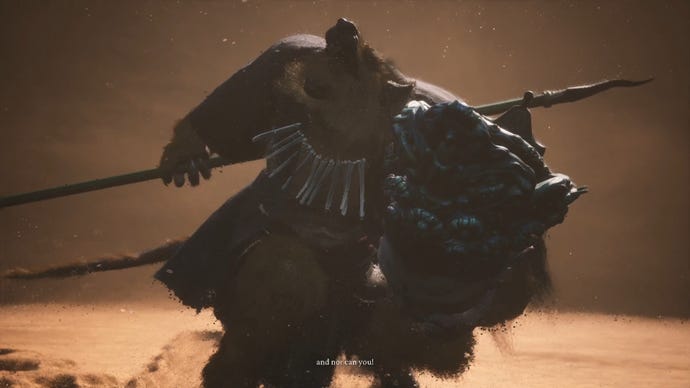
The Yellow Wind Sage is the final main story boss of Chapter 2, and he's probably the toughest Yaoguai you'll face in this chapter, so don't face him unprepared. To reach the Yellow Wind Sage's location, you can take one of the two following paths:
- Interact with the Tally in the Tiger Vanguard arena (after obtaining both Keeness Of Tiger and Sterness Of Stone), and descend into the Cellar region.
- Progress to the "Windseal Gate" Shrine beyond the Stone Vanguard or the Gore-Eye Daoist, and go through the large double doors.
Both these routes will take you to the same large deserty area, and at the end of this area you can walk into the sandstorm to begin your fight against the powerful Yellow Wind Sage. This foe combines the speed of the Tiger Vanguard with the strength of the Stone Vanguard, but the worst thing about him is his array of hard-to-avoid wind-based attacks. For this reason, I highly recommend you first defeat Fuban, one of the chapter's secret bosses, because it drops an anti-wind vessel that counteracts bastards like the Yellow Wind Sage.
12. Shigandang (secret boss)
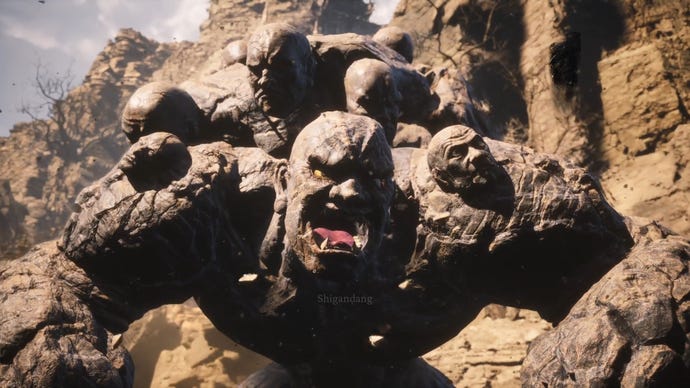
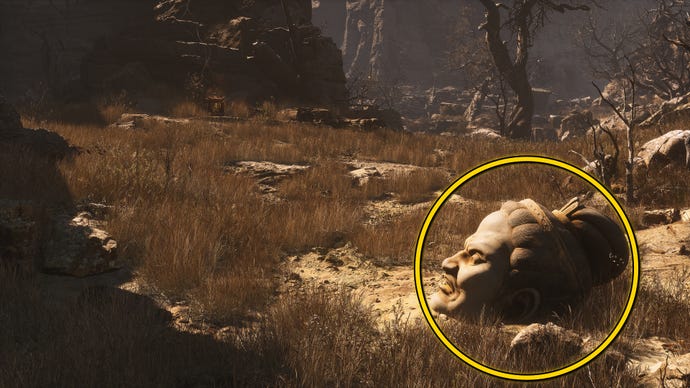
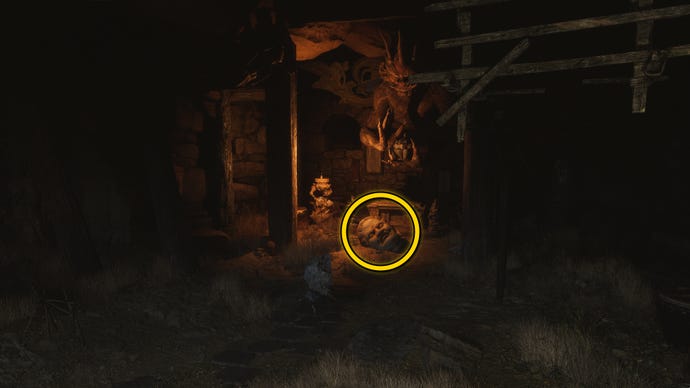
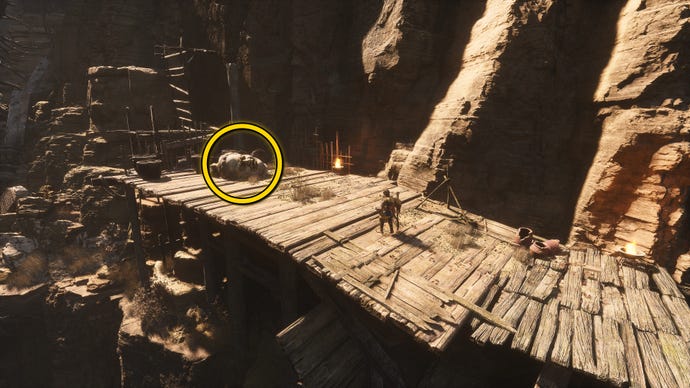
Shigandang is a secret boss that can be found in exactly the same arena as the Stone Vanguard, back at the far end of Fright Cliff. To unlock this boss, you need to collect all six Buddha's Eyeballs scattered throughout Fright Cliff. Each one can be plucked from an associated giant Buddha head statue. The six Buddha Eyeballs can be found in the following locations:
- At the start of Fright Cliff, just before the "Squall Hideout" Shrine.
- In the cave on the left path from the "Squall Hideout" Shrine.
- On the wooden platforms overlooking the Man-In-Stone path.
- On the upper path left of the Man-In-Stone path.
- On the balcony to the right of the Mother Of Stones boss arena.
- Left of the "Rockrest Flat" Shrine.
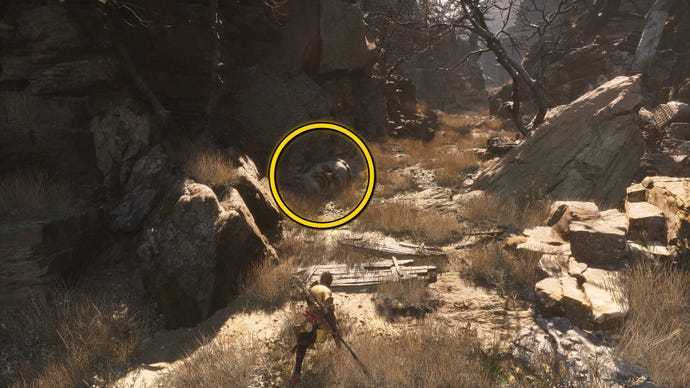
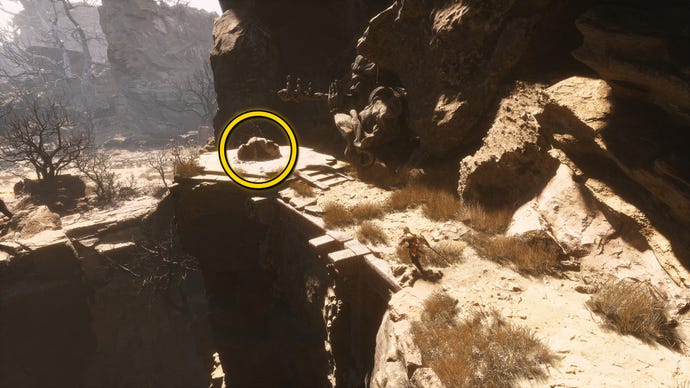
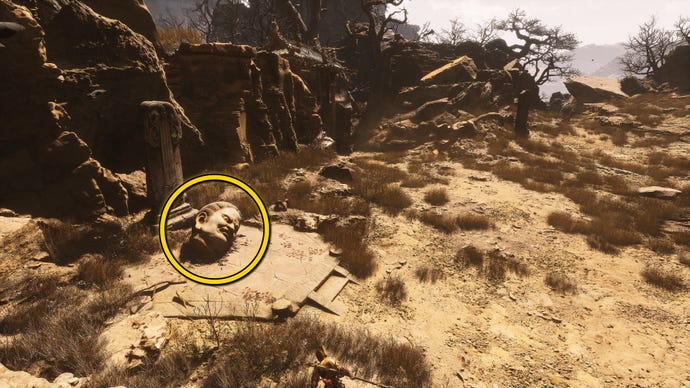
Take all six Buddha's Eyeballs to the large boulder in the Stone Vanguard arena, and you'll find that you can interact with the boulder to place all the Eyeballs inside it. At this point, the boulder will rise from the ground and become the secret Yaoguai King, Shigandang. Expect a fight very similar in nature to the Stone Vanguard here, albeit against a slightly more powerful foe. He's big, he's slow, and he hits hard. The most dangerous thing about this boss is the shockwaves it releases when it slams or pulls its fists out of the ground.
13. Mad Tiger (secret boss)
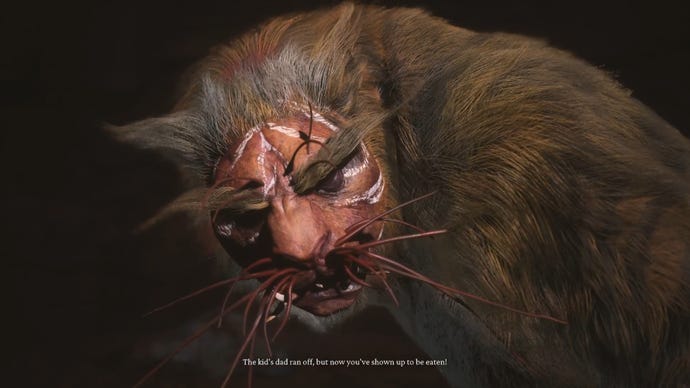
The Mad Tiger is a Yaoguai Chief that can only be unlocked by completing the Old Rattle-Drum questline. Don't know what I'm on about? Once you defeat the Tiger's Acolyte you'll receive the Old Rattle-Drum item. After this, if you travel to three specific areas in order you can interact with the spirit of a child, who will lead you to a the secret Mad Tiger boss.
Here are the three locations where you can use the Old Rattle-Drum:
- In the right-hand area with lots of corpses inside Windrest Hamlet.
- On the right-hand side just beyond the main doors you unlock in the Valley Of Despair.
- By the well in the far end of the Earth Wolf arena.
After playing the Old Rattle-Drum at all three locations, the child will appear next to the well, and jump inside, inviting you to follow. Interact with the well to jump down into a new area - the aptly-named "Bottom Of The Well" - where you can fight the Mad Tiger.
The Mad Tiger is very agile, with some startlingly powerful attacks - each of which can take off over half your healthbar in one go. He's definitely intended to be tackled late on in Chapter 2, once you've built up your stats and unlocked as many Skills as possible. Synergise the Immobilize, Red Tides, and A Pluck Of Many spells in order to burst down the Mad Tiger's health early on and control the tempo of the fight from the start.
14. Yellow-Robed Squire (secret boss)

When you first meet the boar-faced Yellow-Robed Squire, he is a passive NPC rather than a boss to fight. You can find him resting in a clearing at the far end of the Rockrest Flat, too drunk to get up. His questline unlocks the ability to fight 3 new bosses (including himself), so here are the steps to follow:
- Obtain a Sobering Stone from Windrest Hamlet or the Man-In-Stone's shop.
- Deliver the Sobering Stone to the Yellow-Robed Squire.
- Travel to the Crouching Tiger Temple and speak to the Squire there.
- Deliver a Jade Lotus to the Squire at the Temple.
- Return to the Rockrest Flat where you first saw the Squire, and approach him while he's pacing nearby.
If you complete all of the above steps, then as you approach the Yellow-Robed Squire he will attack you. Defeat him, and he'll approve of your strength and invite you to follow him through the double doors behind where you fought. Go through the double doors to enter Chapter 2's secret region, where the next two bosses in this list await you!
15. "Tiger Vanguard" (secret boss)
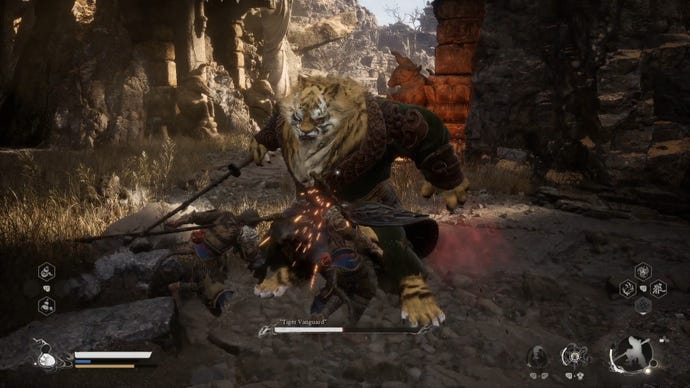
The "Tiger Vanguard" is a variant of the original Tiger Vanguard who you encounter a short way into the secret area that you can unlock by following the Yellow-Robed Squire's questline. So if you haven't already, read the instructions just above to learn how to face this boss!
This alternate Vanguard is mercifully easier than the original Tiger Vanguard, but shares a lot of the same traits and moves, including a surprising agility and some highly damaging combos. With spells like A Flock Of Many now at your fingertips though, it shouldn't be too difficult to overwhelm the Vanguard and force him to let you pass beyond the gate it guards.
16. Fuban (secret boss)
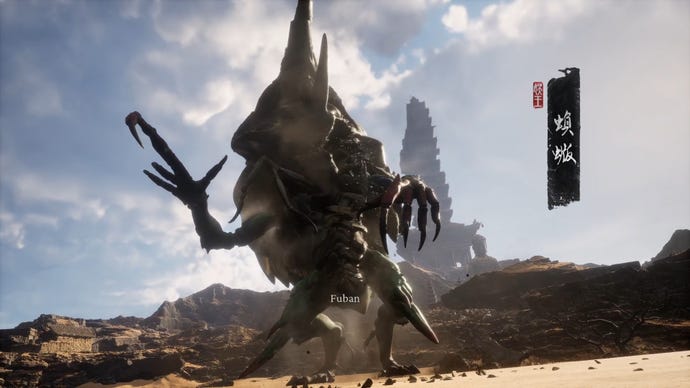
Fuban is the main boss and Yaoguai King of the secret region that you unlock as part of the Yellow-Robed Squire quest. In this memory realm, you must join the Yellow Wind Sage in battle against Fuban, a gigantic sand beetle that terrorises the desert. To find him and begin the fight, simply walk up to the hill where the Yellow Wind Sage is waiting next to a giant drum, a short distance past the "Tiger Vanguard".
The fight against Fuban is actually quite simple, and quite scripted. At first you'll fight the beetle alone, and you must attack its legs as they are the only body part that take any damage. All the while, Fuban will attack you with very slow, powerful slam attacks which are fairly easy to dodge. In the next phase, you can climb up onto Fuban's back and destroy the vessel it carries, allowing the Yellow Wind Sage to join the fight and quickly take Fuban down with your help.
As a reward for felling this secret Yaoguai King, you'll gain a Vessel which can counteract wind-based attacks - making it exceptionally handy against the Yellow Wind Sage boss fight end the end of Chapter 2.
17. Black Loong (secret boss)
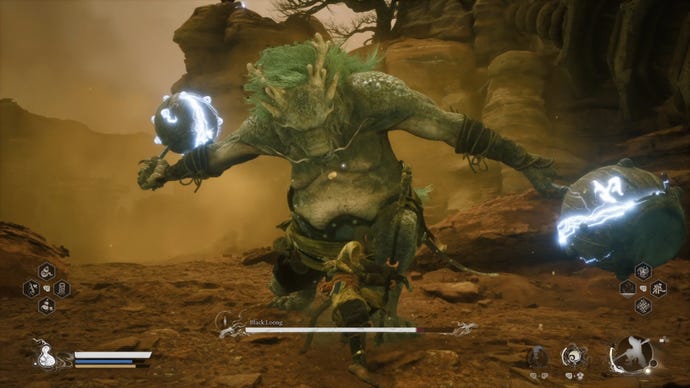
The final boss in our Chapter 2 list is Black Loong, a very easily missed Yaoguai King who resides behind a "sand waterfall" to the right of the Rockrest Flat Shrine. You can only access this boss by obtaining a specific item elsewhere in this chapter: the Loong Scale. Incidentally, this is the same item that gives you access to the Red Loong boss in the Forest Of Wolves in Chapter 1. Below we'll go over how to get the Loong Scale, and how to find and defeat the Black Loong.
How to get the Loong Scale
To get the Loong Scale in order to unlock the Black Loong boss fight, you need to break open the clay wall on the left-hand side of the First Prince boss arena in the Valley Of Despair. Normal attacks aren't strong enough to crack it, but there are still multiple ways that you can break open the wall:
- Get the First Rat Prince to attack the wall.
- Use the Wandering Wight Spirit's attack on the wall.
- Use the Azure Dust form's slam attack on the wall (Azure Dust is obtained by completing the Man-In-Stone questline).
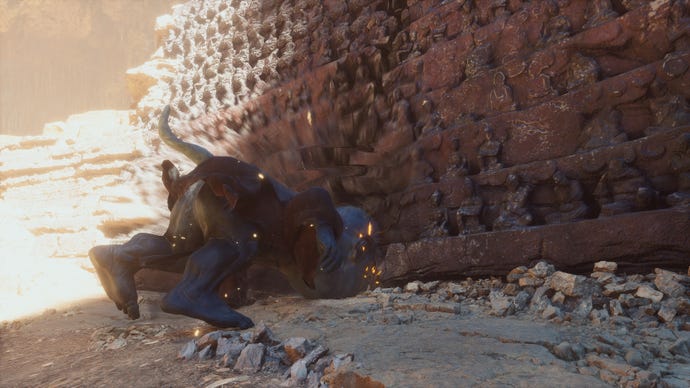
Once you crack the wall, you can interact with the crack to squeeze through it and into a small secret room. Inside this room there is a chest containing the Loong Scale.
Where to find Black Loong
Once you have the Loong Scale, take it to the large sand waterfall on your right-hand side as you stand before the Rockrest Flat Shrine in Fright Cliff. As you approach the sandfall, you'll get a prompt to interact with it using the Loong Scale. Doing so will dispel the sand, allowing you to pass beyond into the Black Loong boss arena.
Unlike the Red Loong of Chapter 1, the Black Loong is humanoid in form, albeit very large and bestial as befits a draconic Yaoguai King. At first glance this powerful bossay appear fairly easy - it has some very powerful attacks but they're quite easy to dodge. However, it has one devilish special move, where it repeatedly strikes the ground to produce electric shockwave after shockwave, and it's exceptionally difficult to avoid them all. The best way to deal with this attack is to clamber onto a nearby rock. There you can stand calmly, entirely safe from the Black Loong's tantrum, until the time comes to return to the fight and finish him off.
That concludes our guide on how to find every single boss in Chapter 1 of Black Myth: Wukong! If you're struggling to defeat certain bosses in this list, you can gain the upper hand with our guide on the best skills in Black Myth: Wukong.
