How to calibrate and customise gyro controls on the Steam Deck
Don’t go on tilt with bad gyro settings
As someone who hasn’t been able to aim with thumbsticks since about 2008, the ability to calibrate, customise, and ultimately deploy gyro controls on the Steam Deck has me considering the internal gyroscope as one of the Deck’s hidden gems. Not every game will support motion input, but in those that do, it can be a more comfortable alternative to the sticks and trackpads; you are, after all, harnessing the precision of using both hands in tandem, rather than a single crooked thumb.
That said, the whole system ain't worth a jot if the gyroscope isn’t calibrated correctly. Below, you can see step-by-step how to calibrate the Steam Deck’s gyro controls – as well as how to adjust them (or, if you’re left unconvinced, disable them entirely) on a per-game basis. There's no need to switch into Desktop Mode for this, and in fact, these settings are freely tweakable while you're already in-game.
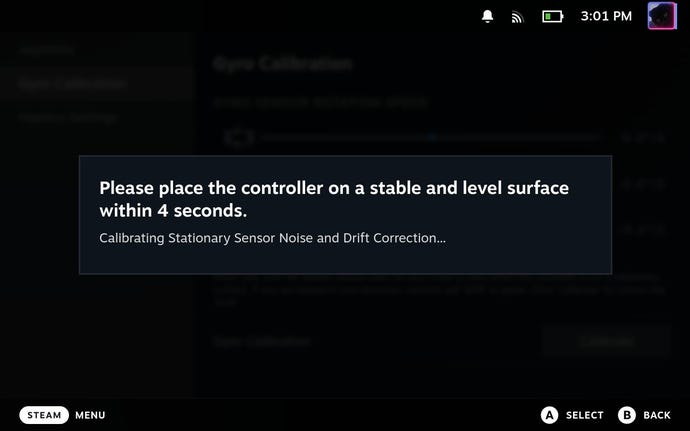
It's probably worth mentioning, though, that calibration requires the Deck be laid down on a flat, stable, completely level surface, and within just four seconds of activating the process. In other words, don’t try this on the bus. Make sure you have a desk, table, or convenient catwalk runway to hand before you begin, lest you end up scrambling for a patch of clear space while that (admittedly, rather stingy) timer ticks down.
How to calibrate gyro controls on the Steam Deck
Step 1: Press the Steam button and open the Settings menu.

Step 2: Scroll down to the Controller section. Here, look for "Calibration & Advanced Settings" - you’ll need to scroll down again within this sub-menu to find it – and hit "Open".
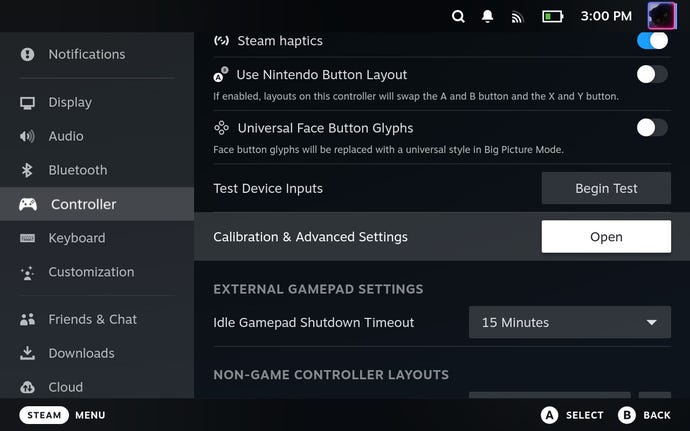
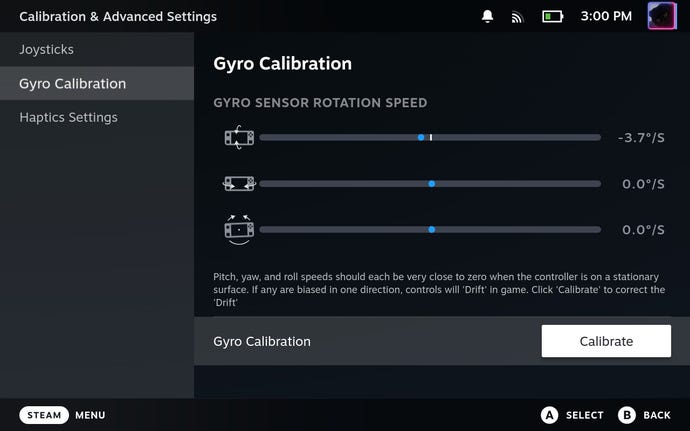
Step 3: Select "Gyro Calibration". You’ll see three bars with little dots that jiggle back and forth as you move your Steam Deck around. Just below this is a "Calibrate" button, so get your chosen flat surface clear and press it.
...The button, not the surface.
Step 4: Immediately place your Steam Deck down and leave it there for a few seconds; as the screen will remind you, you’ve only got four seconds to do this. Happily, the calibration process doesn’t take much longer itself, so once you see the "Calibration Succeeded" message, press the B button to close. And that’s it: one calibrated Steam Deck gyroscope, ready for handheld-waving shooty fun times.
How to customise or disable gyro controls on the Steam Deck
Step 1: Gyro control customisation is on an individual game-to-game basis, so start by selecting the game you want to adjust for from your Library.

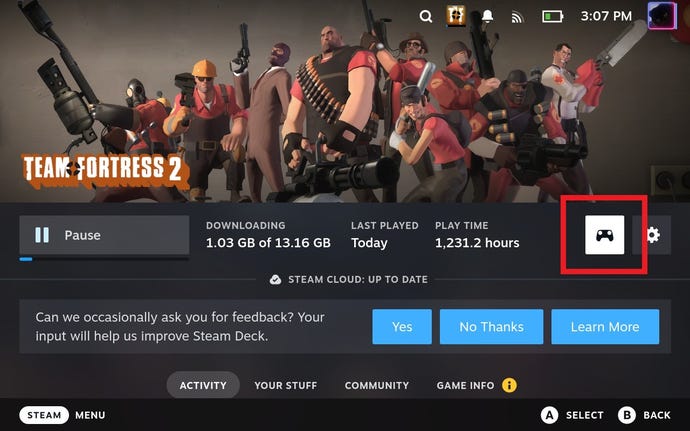
Step 2: Select the Controller Settings icon, which is the little image of a gamepad on the right, next to the cog icon.
Step 3: Scroll down to the "Gyro Behavior" section. To disable gyro controls entirely, simply choose "None" from the drop-down list.
Or, if you want to alter what the gyro input is used for, select a difference behaviour from this list. In the pictured example, Team Fortress 2 allows you to use gyro controls for aiming (via the "Look" option) or for player movement, the latter essentially having the gyroscope replace the left thumbstick.
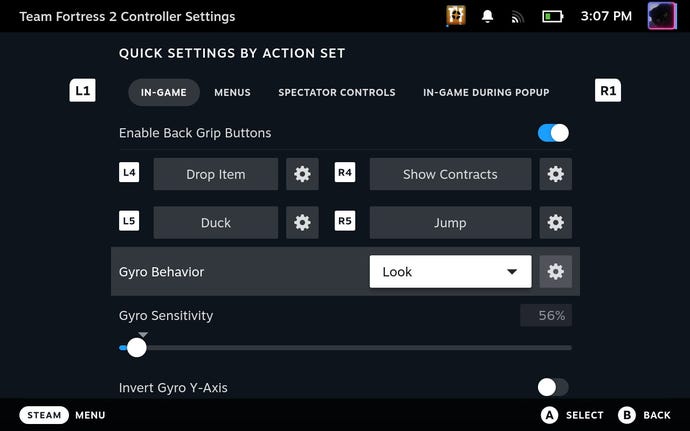
Step 4: There are loads more customisation options available by pressing the cog icon next to the currently selected gyro behaviour. These include the choice of inverting the X or Y axes, raising or lowering the movement threshold (useful if you don’t want every tiny twitch to register as an input), and the Gyro Activation Buttons. These are vital if you only want to have gyro controls enabled while holding a certain button, or in the thumbstick and trackpads’ case, simply having a thumb resting on top of them. I won’t make any specific recommendations here – just try out and adjust these settings to find a setup that you find most comfortable.
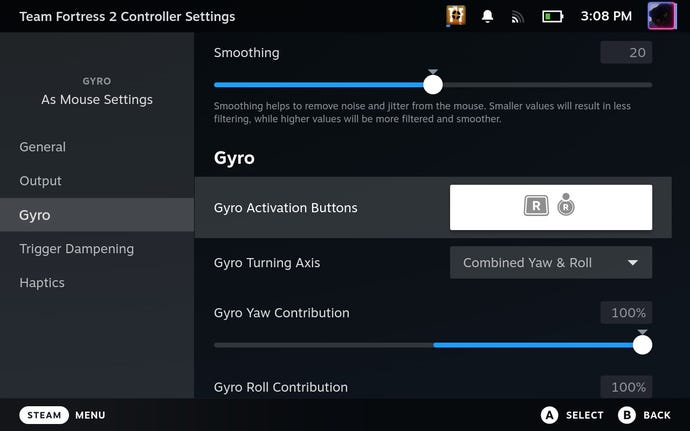
Remember, also, that all these settings can also be rejigged on the fly. While you’re playing a game, just press the Steam button, and find the Controller Settings shortcut on the right, under the game menu. This is exactly the same Controller Settings menu that you'd see by accessing it via the Library, so you can make all the same kinds of adjustments, or disable gyro input entirely.

